Customizing SharePoint 2007 List Forms (DispForm.aspx, NewForm.aspx, EditForm.aspx)

1 nhận xét

[Updated Feb 27, 2008] It's important to note that customizing forms breaks attachment support! If you're going to be attaching documents to these list items you will either need to write code to upload the attachments yourself or NOT customize the form. This is still not fixed with SP1.
When you create a new list in SharePoint, a default form for viewing, editing and adding are provisioned for you by SharePoint. This is also true for any views that you define on the list. SharePoint creates an .aspx page at http://siteroot/Lists/ListName/DispForm.aspx. You can see all these pages using the SharePoint Designer.


Be default they are basically a WebPartZone with a ListFormWebPart inside.

The real story though is that you can customize these lists. Not only can you very easily create your own, but you can tell the list to always use your form. You can even tell the list to use your form for certain Content Types (if the list has multiples) and use the default Form for other Content Types.

Creating a Custom List

In the following example we're going to create a new Form for adding contacts, then we'll have SharePoint Designer change it so that it can use the current master page and participate in any branding effort you may be doing.

  1. Right click on the list (ie. Contacts) then go to New->ASPX.
  2. Rename the form to something that makes sense (ie. NewContact.aspx)
  3. Now we need to turn this blank form into a page that can view content from the list. Double click on the form. Once it's in focus in SharePoint Designer on the toolbar click Insert->SharePoint Controls->Custom List Form (see below). In the popup choose your list (ie. Contacts) and the type of form you want to customize (ie. NewForm). Notice that you can also choose a Content Type to customize the forms for. You can literally have a separate customized 'NewForm' for each Content Type that the list stores. Click Ok and watch as your form gets automagically tee'd up with all the controls it needs allow users to add Contacts to the list.

  4. Now that we have a form that can add new Contacts, lets make sure it enforces our brand by attaching a Master Page. Click Format->Master Page->Attach Master Page. Choose the 'Default Master Page' and watch SharePoint Designer neatly place all the markup that matters inside of a ContentPlaceHolder and attach the current runtime master page.
  5. Ok our last step, we need to tell our list to use our new customized form. Right click on the list in question. Click 'Properties'. Click on the 'Supporting Files' tab and then change the 'New item form' to the .aspx you just made. It's of note that the .aspx needs to be housed inside the list, you can't just house it anywhere.
  6. You're done, head back to your contacts list (in SharePoint and add a new item, you'll see the form that we just made). You can of course do the same for DispForm.aspx and EditForm.aspx.

Here's a screen shot of some text that we changed on the form. Future posts will get into actually working with SharePoint controls and putting a code behind on the form, so you can write some C# to alter the behavior of this form (in addition to changing the declarative markup in this .aspx).

Ok, that's it for now. Good luck.

(Source:blog.tylerholmes.com)

Using ‘Send To’ context menu option

1 nhận xét

OK gentle reader, this is a long one, so grab your double-caf-half-caf-diet latte and get comfortable… here we go…

One of the options available to a document library item is the “Send To” option found in the context menu.

This offers several choices as you can see and another option can be made available that is not shown yet. First we will touch on what is shown above…

Download a Copy – this sounds pretty self-explanatory, but there is a small twist. When you choose this option you get the dialog box shown giving you the option to open or save the document.

Choosing ‘Open’ will do just that, open the document.

Choosing ‘Save’ will open the ‘Save As’ dialog box so you can save a copy of the document to your local workstation or network drive.

Email a Link – this will open your default email client and insert a link to the document in the body of the email. You can then add your recipients and subject and send the email. The recipients will then have a link they can click that will points directly to that document, not the library.

Create Document Workspace – This option will create a sub site using the Document Workspace site template and a copy of the document into the ‘Shared Documents’ library of the new sub site. This could be very useful but it depends on what you want over all is a bit out of scope for this article. I will touch on Document Workspace in a separate article.

Other Location – this option gets a bit involved… Basically it gives you the option to add one or more document library locations to copy the document to, and it keeps track of those locations for future updates and copying.

The first time you choose this option you see this…

It pre-fills the destination with the current sites URL, and file name is pre-filled with the name of the document you are working against. Unfortunately there is no “browse” feature to search through a list of document libs on the current site or navigate a site collection. You have to get the full URL to the document library you wish to copy to and insert that URL in the Destination textbox. Use the ‘click here to test’ link to make sure your URL takes you to the correct document library. The destination MUST be a document library or an error will be thrown in a later step.
The option to create an alert is exactly that; it will create an alert so you are notified anytime that document is updated.
The option ‘Prompt the author to send out updates when the document is checked in?’ will provide an option to update your copies when you use the ‘Publish Major Version’ context menu. Notice the option at the bottom of the screen shot below.

If you choose ‘Yes’ to update the copies, you will see a screen similar to the one below asking you to choose which location(s) you wish to receive the updated copy and SharePoint will automatically copy the published version to that location(s).

When you click OK, you will see a screen like this to verify the location(s) you chose.

You will then be shown a screen to let you know if it was successful or not. If you did not put in a URL pointing to a document library, this is where you will see the error thrown.

After you have done this process once, the context menu will change for that document.

Notice there is now an ‘Existing Copies’ option. Choosing that option will show a screen much like we saw earlier but showing the destinations associated to the document.

Choose the locations you want to send a copy and the steps are just like you encountered earlier.

All pretty slick and it works like a charm. So this could be a viable option if you find that you really need to copy your content to alternate location(s).

But what happens if you need to remove a destination? I bet you did not notice that an option for that has not been seen in any of the menu options huh? Admit it, you did not even think about this little piece did you? J

That’s OK, I got your back.

If you have to remove a destination from a document for whatever reason; it no longer exists, or is no longer needed, you can manage your destinations very easily.

In the context menu for the document, choose ‘View Properties’.


You will now see the menu bar with a new option available, ‘Manage Copies’.

Clicking ‘manage Copies’ opens a window like this.

From here you can manage the destinations and add new destinations. Notice the destinations are grouped by those that prompt for update and those that do not.

Clicking the ‘Update Copies’ will open the ‘Update Copies’ window we have seen before where you can choose which destinations get updated. This way you do not have to check in the document again, you can just push it out as is.

Clicking the edit icon opens a window much like we saw at the beginning of this process, with a new button for ‘Remove Link’.

Now you can update the settings as you need or remove the link all together.

Well I guess that about covers it… but wait there’s more!

One last thing to bring to your attention and then we can all get back to work…

Not all of our users may be that computer savvy and expecting them to get a full URL to a document library, let alone multiple document libraries, may be a bit to ask. There may be a solution for that…

…a custom ‘Send To’ option. Calm down… I do not mean you have to hire a developer to create a custom solution for you. SharePoint already makes this available to you. Isn’t that nice of them?!

This option makes it possible to have one single destination where all the documents in a library can have a context menu option for sending a copy to, and do it with a simple mouse click.

Here’s how to set this up…

Go into the settings for your document library and click the ‘Advanced Settings’ option.

A little more than halfway down the screen you should see an option for ‘Custom Send To Destination’.

Here you can enter a name for your destination and the URL to a Document Library

You can see I named my destination ‘Shared Docs’ and gave it the URL for the Shared Documents library. It should go without saying that the name should be somewhat descriptive so users get an idea of where it is going. Duh?

Click OK and then go back into your doc lib.

Now the context menu will show your custom option for users to leverage, and it is available to all the documents in the library.


Pretty slick huh? Unfortunately each document library can only have one custom send to destination. If you really need to have multiple locations, then you will need to use the ‘other locations’ option.

So, that should cover “Send To” about as deep as I can. I hope you found this useful.

Happy coding!!

Brian

(Source:briankgough.wordpress.com)

Site Directory in MOSS 2007 via a custom Search Scope

0 nhận xét

In a Microsoft Office SharePoint Server (MOSS) 2007, you will likely need to provide your users a list of sites you host. There are a few ways to do this.

First, you can leverage the out-of-the-box Site Directory template, coupled with a few settings in Central Admin to force users to select one or two categories, that can be a good solution, specially if you don't have too many sites and you can afford to have someone overseeing the directory. For a very large number of sites, that might not work. Also, there is chance someone will miscategorize sites and you'll likely need someone to approve all site listings.

Another way to do it is to leverage the out-of-the-box site membership feature you get with the profile services (or "my sites"). MOSS does a pretty good job of keeping track (via the Profile database and a timer job) of all the sites each user is a member of. There are a few issues there as well and this will not work if you have a multi-farm deployment since there is no synching of profile information between farms (unless you write code for that yourself). There's also the issue of the timer job that updates the profile database being unable to figure out you're a member of the site if you're not explicitly in the members list (as opposed to being in an active directory group that is in the member list).

A third way of finding this kind of information is using Search. This is likely the best option for very large implementations that include multiple farms and many thousands of sites. In a situation like that you will likely need to implement search properly anyway and you can just leverage that. You could even create a custom search results page to format the output in a more adequate way and you will only see a site if you have access to it. To put this in place, however, you need to provide a way to search only for sites. There's no property or search modifier to do that for you on the search box itself, but you can implement this using a special search scope.

Creating a scope that includes just sites is not really hard. All you need to do is go to the Search Settings page in the Shared Services Provider administration page and create a new scope with a corresponding rule. You can do something similar to the out-of-the-box scope for "People", with a rule based on the Content Class of the item. The Content Class for people, for instance, is "urn:content-class:SPSPeople".

The hard part is to find out what string to use in the content class for sites. The information is actually out there, but it's somewhat hidden in an MSDN article at http://msdn2.microsoft.com/en-gb/library/ms975759.aspx. The correct string for sites is “STS_Web” (strangely enough, it’s not “urn:content-class-STS_Web”, just “STS_Web”). With that info at hand and using the "People" scope as an example, you should be able to create a scope that includes only sites, nothing else.

For the record, here are all the different strings you can use with the ContentClass:

  • Search Query: urn:content-class:SPSSearchQuery
  • News Listing: urn:content-class:SPSListing:News
  • People: urn:content-class:SPSPeople
  • Category: urn:content-classes:SPSCategory
  • Listing: urn:content-classes:SPSListing
  • Person Listing: urn:content-classes:SPSPersonListing
  • Text Listing: urn:content-classes:SPSTextListing
  • Site Listing: urn:content-classes:SPSSiteListing
  • Site Registry Listing: urn:content-classes:SPSSiteRegistry
  • Site: STS_Web
  • List: STS_List
  • List Item: STS_ListItem
  • Events: STS_List_Events
  • Tasks: STS_List_Tasks
  • Announcements: STS_List_Announcements
  • Discussions: STS_List_DiscussionBoard
  • Contacts: STS_List_Contacts
  • Links: STS_List_Links
  • Document Library: STS_List_DocumentLibrary
  • Document Library Items: STS_ListItem_DocumentLibrary
  • Picture Library: STS_List_PictureLibrary
  • Picture Library Items: STS_ListItem_PictureLibrary

Update on 09/19/2008, as e-mailed to me by Kei:

  • Site Collections: STS_Site
  • Source:blogs.technet.com

Add a context menu: Send document link by email.

0 nhận xét
Introduction and project outline

Ok, this is a well documented task, but I wanted to add my own methods here.

This post will detail how to add a Send Document Link By Email page to the context menu of a document library (and a picture library). A later post will tell you how to send the actual document by email.

To add an item to the context menu we need to do the following:

  1. Create a custom_ows.js file
  2. Add methods to custom_ows.js file to add new menu items
  3. Add CustomJS attribute to site definition
  4. Create a asp.net project to hold your CustomMenuAction pages

1. Create a custom_ows.js file

Windows SharePoint Services uses a file called ows.js to hold a whole bunch of javascript code used throughout the application, including creating the Menu options used in the Sharepoint context menu's.

We could of course just alter this file to add our new options, but that is not recommended because if Microsoft release an update or service pack, they may make changes to their default files, including this one. So, they very cleverly gave us the ability to use the custom_ows.js file. A method in this file gets called at before ows.js creates it's own menu options. So, our menu items will appear at the top of the list.

We can also use this file to override the existing menu items, which allows us to either remove them or change their action without having to edit the ows.js file directly.

Create a empty text file called custom_ows.js in the folder:
C:\Program Files\Common Files\Microsoft Shared\web server extensions\60\TEMPLATE\LAYOUTS\1033

2. Add methods to custom_ows.js file to add new menu items

Open the file for editing and paste in the following code:

function Custom_AddDocLibMenuItems(m, ctx)
{
var currentItemFileUrl;
var currentItemFSObjType;

if (currentItemFileUrl == null)
currentItemFileUrl = itemTable.ServerUrl;

if (currentItemFSObjType == null)
currentItemFSObjType = itemTable.FSObjType;

if (currentItemFSObjType != 1)
{
// Add Send Link By Email Menu Item
var strDisplayText = "Send Link By Email";
var strAction = "SendLinkByEmail('" + ctx.HttpRoot + "', 'FileName=" + currentItemFileUrl + "')";
var strImagePath = ctx.imagesPath + "EML16.GIF";

// Add our new menu item
CAMOpt(m, strDisplayText, strAction, strImagePath);

// add a separator to the menu
CAMSep(m);
}

return false; // this enables the rest of the menu items to be rendered.
}

function SendLinkByEmail(strHttpRoot, strArgs)
{
var strUrl = strHttpRoot + "/_layouts/" + L_Language_Text + "/3iSendLinkByEmail.aspx?" + strArgs + "&Source=" + GetSource();
window.location.href = strUrl;
}

The first function Custom_AddDocLibMenuItems() is the method called by ows.js. This is the function we use to add our own menu items.

It takes a bit of time figuring out how to use these methods, and you really do need to spend time looking into the ows.js file to see what you can do and use in your own code. Hopefully this example will give you a start, but as we all know, there is no such thing as a free lunch, and you DO have to put some effort into learning it!

First thing we do is declare 2 variable:

var currentItemFileUrl;
var currentItemFSObjType;

currentItemFileUrl tells us, funnily enough, the URL of the file we used to click the context menu on and currentItemFSObjType tells us the type of object we are dealing with.

The next to lines of code populate these values:

if (currentItemFileUrl == null)
currentItemFileUrl = itemTable.ServerUrl;

if (currentItemFSObjType == null)
currentItemFSObjType = itemTable.FSObjType;

itemTable holds a whole load of useful values. Take a hunt through ows.js to see what else it can do. I'll try to write a blog article about this another time.

The next bit of code checks the FSObjType is not 1. This is because we don't want the menu items to be displayed on folders, only documents.

if (currentItemFSObjType != 1)
{

We are finally ready to create the link. We need to set some properties first, such as the Display Text, Action and Image Path:


// Add Send Link By Email Menu Item
var strDisplayText = "Send Link By Email";
var strAction = "SendLinkByEmail('" + ctx.HttpRoot + "', 'FileName=" + currentItemFileUrl + "')";
var strImagePath = ctx.imagesPath + "EML16.GIF";

As you can see the Action text declares another Javascript function SendLinkByEmail and pass on the site Url and the File Url. We will create this function in just a minute.

Once we have configured these values we can call a simple function that adds the menu item to the menu item collection (notice the m parameter that we passed into the function?)

// Add our new menu item
CAMOpt(m, strDisplayText, strAction, strImagePath);

The last thing we want to do is add a seperator to our menu.

// add a separator to the menu
CAMSep(m);

Well, maybe this isn't quite a minute on, but I did say we would come to the SendLinkByEmail function soon!


function SendLinkByEmail(strHttpRoot, strArgs)
{
var strUrl = strHttpRoot + "/_layouts/" + L_Language_Text + "/3iSendLinkByEmail.aspx?" + strArgs + "&Source=" + GetSource();
window.location.href = strUrl;
}

Now, when the user clicks on the menu item we want to redirect them to a page of our choosing. In this case it will be a aspx file of our creation that resides in the /_layouts/1033/ directoy.

3. Add CustomJS attribute to site definition

Once we have created our custom_ows.js file we need to make sure our SharePoint sites know how to find it. To do this we need to edit our site definitions so that they contain a CustomJS attribute when we create out sites.

There is a very important fact to remember here, this change will NOT affect sites already created, it will only allow this code to work with sites created AFTER we make this change.

If you are not familiar with Site Definitions in SharePoint, then shame on you! This is not the place for a discussion of User Templates Vs Site Definitons, but there will come a time when you'll be able to read all about it here. In the mean time there are a lot of places on the googlenet which will cover in glorious detail.

Site Definitions can be found in the following folder on your SharePoint server:
C:\Program Files\Common Files\Microsoft Shared\web server extensions\60\TEMPLATE\1033\

Once again, it is not recomended that you modify the standard Microsoft files, and that goes for these site definitions. If you want to configure your own definitions then it is generally recommended that you make a copy of one of the site definitions and customise that. This operation is not part of this blog entry, but will be covered later. Again, you can and should, check out one of the many other blogs entries out there on the internet that describe how to do this. For the sake of this article we will modify the STS site definition, which is the default definition used for WSS team sites.

Navigate into the \STS\XML\ folder and you will see the gorgeous ONET.XML file. Get to know this file well. If you are planning on customising your SharePoint definitions then you will have to learn to love your little onet.xml friend!

Fortunately for us, we only need to look at the first line at this point, well, actually the third line if you want to get pedantic! basically change this line:

And add the CustomJS attribut so it looks like this:

You may notice that we use [%=System.Threading.Thread.CurrentThread.CurrentUICulture.LCID%] as part of our URL. This lets us support multiple localities within SharePoint. I don't want to go any further into this in this article, but basically, for the English speaking world, this will resolve down to 1033 when the page runs.

4. Create a asp.net project to hold your CustomMenuAction pages

Now that we have the custom menu items showing on the context menu, we need to write the code to actually perform the menu actions.

Create a standard asp.net project in Visual Studio.Net and call is something like SPCustomMenuActions. This project can be used to store all your custom menu items, rather than creating a new project for each.

Add a webform to this project called SendDocumentByEmail. You can now create this page as a standard asp.net webform.

I will cover this specific page in a future entry.

Mark
Source:sharepointstudio.markstokes.com

SharePoint – Outlook Synchronization

0 nhận xét
You can configure your Outlook to synchronize the Tasks, Events, Calendar with SharePoint lists. This is possible thru the stssync Protocol.

The stssync protocol enables you to add an Events list or a Contacts list that exists on a Microsoft Windows SharePoint Services site to Microsoft Office Outlook 2003 / 2007 or to a third-party application that supports the protocol.

The URL which does this synchronization is having format of

stssync://sts/?ver=version&type=folder-type&cmd=command-name&base-url=sts-url&guid=the-guid&site-name=site-friendly-name&list-name=list-friendly-name&list-url=list-url&user-id=uid

e.g.

stssync://sts/?ver=1.1&type=tasks&cmd=add-folder&base-url=http://moss:99/Test/CompanySite&list-url=/Lists/Project%20Tasks/&guid={5d0b44fe1-3041-43f9-8be6-c330c1444538}&site-name=CompanySite&list-name=Project? Tasks

Where :

version :

The version of the application in the format x.y. For example, for Outlook 2003, the value of this parameter should be 1.0. For outlook 2007 version is 1.1. The values x and y must be composed of numbers only. x must not start with a zero, and y must be either zero or some other sequence of digits that does not start with a zero. Also x and y cannot be more than two digits each, or Outlook considers the URL to be malformed. A third-party client application may or may not use this parameter, but when the URL is constructed, the parameter must have a value — otherwise, the URL is considered malformed.

folder-type :

Can be calendar or contacts or task, depending on the type of SharePoint list being added to Outlook or to a third-party application. This parameter is case-insensitive.

command-name :

The command name that Outlook or the third-party application understands. Specify add-folder to add a folder to Outlook. More commands may be added to Outlook later.

sts-url :

The URL to the SharePoint site being added. Should not end in a / character.

the-guid :

The GUID that, when paired with the sts-url parameter, uniquely identifies a SharePoint list. Outlook expects this parameter to be in the following format: “{“+ 8 hexadecimal characters + “-” + 4 hexadecimal characters + “-” + 4 hexadecimal characters + “-” + 12 hexadecimal characters + “}”. If this parameter is in a different format, Outlook considers the URL malformed and returns an error.

site-friendly-name :

The display name of the site containing the list that is being added. Outlook uses this parameter to create the folder name.

list-friendly-name :

The display name of the list that is being added. Outlook uses this parameter to create the folder name.

list-url :

A string that is added to the sts-url parameter to create the full URL for the list. Should start with a / character.

uid :

Optional. A number greater than zero, with fewer than eight digits. Uniquely represents a user on the SharePoint site.

Notes

  • Special character escaping: If any of the characters “&”, “\”, “[", "]“, or “|” is part of the value of the sts-url, site-friendly-name, list-friendly-name, or list-url parameter, it must be preceded by a “|” character. For example, a list-friendly-name of Dan [Wilson] – Business\Personal Contacts would become Dan |[Wilson|] – Business|\Personal Contacts.
  • The sts-url, site-friendly-name, list-friendly-name, and list-url parameters can contain Unicode characters. However, the Unicode characters must be enclosed in brackets “[ ]” and must be 4-digit hexadecimal character representations of the Unicode characters.
  • When you connect a Microsoft Windows SharePoint Services task list to Microsoft Office Outlook 2007, some columns may not appear in Outlook 2007. This is because you can synchronize a limited set of predefined properties by using the Connect to Outlook feature. However, you cannot connect custom SharePoint task list columns to Outlook 2007.
    All Outlook 2007 users see the same information when they view synchronized SharePoint task list items. This is true even if an Outlook field such as Categories does not appear in Internet Explorer when you view a SharePoint task list. Outlook synchronizes these properties to other Outlook users through the server that is running Windows SharePoint Services.

    To view an Outlook 2007 field such as Categories in Internet Explorer, add that field as a column template. To add an Outlook 2007 field to the SharePoint task list, use the Add Site Columns command on the Settings menu in the SharePoint task list. Administrators can use this feature to make the appearance of the synchronized SharePoint task list more consistent with Outlook 2007 and can sync a limited set of predefined properties.

To implement a third-party client that can make use of the stssync protocol to add and synchronize Events and Contacts lists that exist on a SharePoint site, you typically need to implement an ActiveX control called StssyncHandler and provide support for the stssync protocol. The third-party client typically needs to be able to decode the URL and synchronize the Contacts or Events list on the SharePoint site. You can use the Microsoft.SharePoint namespace or the Web services exposed by Windows SharePoint Services to perform this task. You also need to register the stssync protocol in the registry with the name of the executable file of your application. In Microsoft Windows operating environments with Microsoft Internet Explorer version 5.0 or later, you can use the sample provided below. Copy the following lines to a .reg file, and replace the “” with the path to the executable file of the application that wants to synchronize events and contacts with Windows SharePoint Services. Then double-click the .reg file to register the stssync protocol on your computer.

Windows Registry Editor Version 5.00

[HKEY_CLASSES_ROOT\stssync]

@=”URL:Add SharePoint Folder”

“URL Protocol”=”"

[HKEY_CLASSES_ROOT\stssync\shell]

@=”open”

[HKEY_CLASSES_ROOT\stssync\shell\open]

@=”"

[HKEY_CLASSES_ROOT\stssync\shell\open\command]

@=” \”%1\”"

Example

stssync://sts/?ver=1.0&type=calendar&cmd=add-folder&base-url=http%3A%2F%2Fspserver1&list-url=%2FLists%2FEvts%2FAllItems%2Easpx&guid=%7BAA7D945C%2DE5C3%2D4854%2DB631%2D10A98E711E2B%7D&site-name=Share|%7CPoint%20|%5BSite|%5D&list-name=Ev[00E900F1]ts

This URL is for a list called “Events” on a site called “Share|Point [Site]” with site URL http://spserver1 and list URL http://spserver1/Lists/Evts/AllItems.aspx. Note the use of the vertical bar to escape the “|”, “[", and "]” characters, and the hexadecimal representation of the two Unicode characters in the list name.


Source:abstractspaces.wordpress.com

Sharepoint Designer: Fetching ID of Lookup Field from Label

0 nhận xét

In sharepoint , on display pages of any list, all the fields are rendered as Label, This creates problem when customization is required having some link of lookup field( rendered as label) from that page.

Since it is label @lookupfieldname returns the value(in text format) of that field not ID for that field value.

For this there is inbuilt function called ddwrt:URLLookup with arguments in following order:

  • GUID of List from which that lookup field belongs
  • Display name of lookup field for current list
  • string(@ID) is to bind value with currrent id of item displayed from current list

so in sample case function for that lookupfield will look like

ddwrt:URLLookup(‘{218F74EE-A2C0-4D22-B8E1-BD91B2F36437}’,'MyContact’, string(@ID)))

where

  • The GUID is the ListId of the Contacts List (change accordingly !)
  • ‘MyContact’ is the internal field name of the lookup field created in the custom list (change accordingly !)
  • @ID passes the reference to the current item for which you want to get the lookup item url

Source:abstractspaces.wordpress.com

Set Multiple Categories to Your SharePoint Blog Posts

0 nhận xét

SharePoint Blog template is really nice one, Quick and easy, but by default SharePoint allows to set only one category to per post.

You can overcome this limitation, and have multiple category to individual posts.

Actually “Category” is nothing but a lookup column of “Categories” list in “Posts”.

Follow this steps and have multiple categories. J

  1. In your home page of blog Select “Manage posts” from admin links

  1. In posts list select Settings > List Settings

  2. Select ‘Category’ column

  3. This will open page to edit the column “Category”. In Additional Column Settings section, just check “Allow multiple Values”. And click OK.
  4. This will set your list to allow selecting multiple categories for your posts.


Filter List View by Current Week

0 nhận xét

If you want to be able to filter the list to only show items where “Date” is this week,

Most common option that appears first is to filter for the last seven days, using a calculated column for [Date]+7 with formula like

=DATE(YEAR([Created]),MONTH([Created]),DAY([Created])+7)

and filtering the view where this new calculated column is >=[Today]

But it is really last 7 days not the week period. I.e. If today is Wednesday, view should display items from Monday to upcoming Sunday (actual current week)

For this solution replace the with appropriate DateTime field base on which you want to filter the view.

  1. Create a calculated column named WeekStart returning type DateTime, with the calculation:

    =IF(TEXT(WEEKDAY(<>),”ddd”)=”Mon”,<>,IF(TEXT(WEEKDAY(<>-1),”ddd”)=”Mon”,<>-,IF(TEXT(WEEKDAY(<>-2),”ddd”)=”Mon”,<>-2,IF(TEXT(WEEKDAY(<>-3),”ddd”)=”Mon”,<>-3,IF(TEXT(WEEKDAY(<>-4),”ddd”)=”Mon”,<>-4,IF(TEXT(WEEKDAY(<>-5),”ddd”)=”Mon”,<>-,<>-6))))))

  2. Create a calculated column named WeekEnd returning type <>time, with the calculation: =IF(TEXT(WEEKDAY(<>),”ddd”)=”Sun”,<>,IF(TEXT(WEEKDAY(<>+1),”ddd”)=”Sun”,<>+1,IF(TEXT(WEEKDAY(<>+2),”ddd”)=”Sun”,<>+2,IF(TEXT(WEEKDAY(<>+3),”ddd”)=”Sun”,<>+3,IF(TEXT(WEEKDAY(<>+4),”ddd”)=”Sun”,<>+4,IF(TEXT(WEEKDAY(<>+5),”ddd”)=”Sun”,<>+5,<>+6))))))
  3. Create a view with the following filter:

    Column: WeekStart <= [Today] AND WeekEnd >= [Today] Source:webcache.googleusercontent.com

Aging Calculated Fields in SharePoint

0 nhận xét

A common question I get and SharePoint challenge is to show the age of something in SharePoint. A typical example is to show the age of a document in days, months, years, etc. Or you might want to keep track of some item (say a coin in a coin collection, or a server in your network). Here we’ll display the age of comic books in a collection in years from the current date. BTW, this isn’t really new as we’ve been doing these tricks for a few years now. I just thought I would share my take on it with the rest of the class.

Setup

First we need a list to keep track of our comic books. Create a new custom list and create a field called “Year Issued”. This should be a numeric field and will be the year the comic book was issued. Add a few entries to the list so you have something like this:

image

Notice that the Year Issued shows 1,962 rather than 1962. This is the default behaviour of a number field so you can either a) use a DataView web part and format this later or b) use a text field instead. We only have this problem because we’re trying to capture the year. While there is the Date field, it requires a date to be picked and it’s not quick to enter a year using the calendar control (especially if it’s old) so a text field might be more appropriate for this case, YMMV.

Magic

Now comes the magic. Create a new field called “Today”. Don’t worry about the type, just use the default but make sure you name it “Today” (without the quotes). Then create a new field called “Age” and make it a calculated field. Down in the calculation column, here’s the formula you use:

image

Notice the use of [Today] in the calculation formula. This is referencing our “placeholder” column we created earlier. Save the calculated column and back at the column list, find the Today column and click on it to edit it. Now in the edit screen, delete it. Yup, get rid of it. We don’t need it anymore.

image

Now take a look at the list, complete with our calculated field showing us the age of our comic books. Cool huh?

image

The Secret

Don’t believe the magicians trick that they won’t tell you how they did it. I’m going to. Built into SharePoint are some pre-determined names. [Today] happens to be one of them. For example, if you want a field to have a value of the current date when something is added to a list, just enter [Today] in the default value. This is great, however if you try to use [Today] in a calculated field you’ll get this message:

image

The secret is to create a placeholder field with same name of [Today]. When the column is validated and saved, it works because it thinks it’s using the column reference you added called [Today] (which you are, at creation of the calculated field). When you removed the column called [Today] the calculated field just used the internal [Today] reference which is that volatile function it couldn’t use before.

You might have noticed after you had the Age column and the placeholder Today column your list might have looked like this:

image

The calculation isn’t quite right here. That’s because the calculated column was using the existing Today field (a blank field) so the calculation was YEAR([Today])-[Year Issued] which translated to YEAR(0)-1962 and produced –63. YEAR(0) (or YEAR(“”) will result in 1899 as it’s value. Once you removed the blank Today column the calculation used the built-in [Today] value which is the current date and voila!

I know. Silly huh? One note about this “workaround”. If you ever need to edit that calculated field again, you’ll need to create the placeholder [Today] column again, otherwise you won’t be able to save it. Again, just create it, edit your calculated field, then delete it. No harm, no foul.

Variations

There are a lot of variations you can do with this, now that you know the trick. For example, rather than getting the information from the user in a text or numeric field, you can use a date field and then show the age in years, months, and days. Or you can use the built-in creation date compared against the Today trick to show you the age of a document in a document library.

Like I said, this isn’t new and ground shattering. Mark Kruger documented something like this here with a more complicated formula (for displaying the text “Post is X days old”). Chris Johnson has it documented here and Dessie Lunsform has a good post on it here along with links to some calculation formula references.

So be creative, experiment, and have fun!

Source:weblogs.asp.net

Using javascript in the NavigateUrlFormat property of the SPMenuField

3 nhận xét

When you use an SPMenuField in an SPGridView, you can use the NavigateUrlFormat property to specify an url to navigate to when the users clicks the cell. Using the TokenNameAndValueFields and the NavigateUrlFields properties you can specified tokens in the Url that should be replaced with the underlying values from the datasource for each row in the grid. This all works fine, but when you try to use a javascript function in the NavigateUrlFormat property, the javascript function is never rendered.

SPMenuField colMenu = new SPMenuField();

colMenu.HeaderText = "Company";
colMenu.TextFields = "Company";

colMenu.MenuTemplateId = "mnuCompany";
colMenu.TokenNameAndValueFields = "COMPANYID=CompanyId";
colMenu.NavigateUrlFields = "CompanyId";
colMenu.NavigateUrlFormat =
"javascript:alert('you have clicked company with id {0}');";
colMenu.SortExpression = "Company";

When you start digging around in the SharePoint libraries using reflector, you’ll see that reason for this is that the code that renders the menu (Microsoft.SharePoint.WebControls.Menu.Render(HtmlTextWriter)) makes a call to ‘SPHttpUtility.HtmlUrlAttributeEncode(string url)’ passing the value of the NavigateUrlFormat (in the SPMenuField class, the value of NavigateUrlFormat is passed to the NavigateUrl property of an internally create Microsoft.SharePoint.WebControls.Menucontrol).

The method SPHttpUtitlity.HtmlUrlAttributeEncode makes a call to SPUrlUtility.IsProtocolAllowedto verify is the requested protocol (javascript: in our case) is allowed. Since the 'javascript' protocal is not in the list, the link will simply not be rendered.

The list of allowed protocols is an hardcoded string array that is initialized in the constructor of SPUrlUtility.

static SPUrlUtility()
{
m_rgstrAllowedProtocols = new string[] { "http://", "https://",
"file://", @"file:\\", "ftp://","mailto:", "msn:", "news:", "nntp:",
"pnm://", "mms://","outlook:" };
}

The list of allowed protocols is available through the public AllowedProtocolsproperty, but it is read-only and since it’s an array, it’s not possible to add additional items to it.

As a workaround, I decided to replace one of the values in the AllowedProtocols array before I render my control in the Render event and set the initial value back when the rendering is done.

The downside of this approach is that any links using the protocol that you replace in the array will not be rendered (as it is no longer an allowed protocol). Therefore I chose to ‘replace’ one of the lesser used protocols: ‘pnm://’

As you can imagine, this is not best practice and even not recommended. Although the AllowedProtocols property is public and therefore should always be available (then again, who will stop MS from changing the public interfaces of their classes if they really want to?).

protected override void Render
{
SPUrlUtility.AllowedProtocols[9] = "javascript:";
try
{

base.Render(writer);
}
Finally
{
SPUrlUtility.AllowedProtocols[9] = "pnm://";
}
}

protected override void CreateChildControls()
{

SPGridView grid = new SPGridView();

SPMenuField colMenu = new SPMenuField();

colMenu.HeaderText = "Company";
colMenu.TextFields = "Company";

colMenu.MenuTemplateId = "mnuCompany";
colMenu.TokenNameAndValueFields = "COMPANYID=CompanyId";
colMenu.NavigateUrlFields = "CompanyId";
colMenu.NavigateUrlFormat =
"javascript:alert('you have clicked company with id {0}');";
colMenu.SortExpression = "Company";

grid.Columns.Add(colMenu);

this.Controls.Add(grid);

... (rest of code ommitted)

}
Source:blog.sdbonline.com

SharePoint User Management

0 nhận xét

Introduction

Microsoft SharePoint is a platform for building and deploying collaborative solutions. It is a centralized web portal that tracks content and documents as well as users, audiences and teams. One of the major challenges for the SharePoint IT administrator is to understand and effectively manage SharePoint user access along with the multiple directory services that co-exist within the corporate network, including numerous web applications, sites, and multiple authentication servers. Since an increasing number of companies are deploying SharePoint on a global enterprise network, connecting a large number of users and in the process creating a structure of corporate hierarchy-based users as well as a formidable social network, user access must be regulated and managed effectively.

This article provides a detailed look at how users and security are managed and configured within SharePoint. It will give you a systematic overview of SharePoint architecture, user authentication configurations, and user security groups and permissions, and explain the differences between Microsoft Office SharePoint Server (MOSS) and Windows SharePoint Services (WSS). This article is written for the latest SharePoint version 3 release.

SharePoint Architecture

User Management in SharePoint with different options and architecture is a very complex subject, and thus it will be worthwhile for us to discuss and understand the out-of-the-box SharePoint user management, security and architecture. The chart in Figure 1 represents the logical SharePoint technology architecture. SharePoint is in its third major release and is comprised of Windows SharePoint Services (WSS) version 3.0 and Microsoft Office SharePoint Server (MOSS) 2007. WSS v3 is a free add-on to the Windows 2003 Server, running on top of SQL Server, Windows 2003 Server and ASP.NET 2.0. MOSS is available in various editions (Standard vs. Enterprise) and options (Excel Services, Content Management, etc.), and runs on top of WSS.

Figure 1: SharePoint Architecture Overview

Since MOSS is built on Windows SharePoint Services (WSS), they share similar architecture and foundations. MOSS provides more application level features and services. It also has different and more extensive User Profile management than WSS. The important point about this architecture is that SharePoint relies on many user management and security principles from the Network Operating system, Microsoft Internet Information Services (IIS) and ASP.Net foundation. In the rest of this section we will take a look at:

· WSS and MOSS architecture

· SharePoint Security (Authentication and Authorization)

· SharePoint User Profiles in MOSS and WSS

Windows SharePoint Services Architecture

WSS is the core platform for SharePoint services. WSS is a logical three-tier that contains a Front End Web Server, a Search and Index server and a Database Server (see Figure 2).

Figure 2: WSS Architecture

WSS is essentially a web-based ASP.NET application that extends an IIS web site processing HTML requests through a set of ASP.NET (.aspx) pages, .Net application programming interface (API), and XML web services. It processes and executes the business logic using a combination of .Net and SharePoint objects assemblies. The data is stored in the backend SQL database. SharePoint presents the information to end users in the standard HTML format compatible with most web browsers. An IIS web site that has been extended with WSS is called a Web Application (virtual server in previous WSS versions). SharePoint Web Applications use an HttpModule and an HttpHandler to re-route incoming traffic to the SharePoint business logic, thus enabling the SharePoint Web Application to coexist with other IIS web applications. Note that this architecture also allows SharePoint and other web applications to share the same user security infrastructure, mainly Windows Server and ASP.NET.

The Search and Index server is an executable (MSSearch.exe) that is installed as web services in Windows Server. Its primary job is to index the content of the database to enable searching on SharePoint lists, documents, and files. Note that MOSS uses entirely different search architecture than WSS.

WSS uses Microsoft SQL Server to store both the configuration and the content in the databases. When WSS is installed it creates a configuration database that stores the metadata, physical configuration and information about every web application that has been extended, as well as all the servers and their roles in the farm. WSS also create an Admin database that stores the content of the Central Administrator tool. In addition, for every extended virtual server, WSS creates a Content Database that stores the actual site content. Note that WSS stores the user information in its content database.

Figure 3: WSS Farm Provision

WSS is also designed to be scalable. In a large or medium server farm, you can assign a multiple cluster database backend and install load balanced architecture for the front end web server as shown in Figure 3. Note that there is only a single Configuration database for all SharePoint servers in the farm.

MOSS Architecture

Although MOSS runs on top of the WSS platform, MOSS provides a number of extended applications and features, such as: Advanced content management and publishing sites, the ability to search the contents of external databases, and more site templates and workspaces.

Figure 4: MOSS Architecture

Instead of running the Search and Index on the same box as WSS, MOSS uses another application server called Shared Services. This is a collection of application servers (a set of services) that can be configured on one server and shared across many different MOSS portal sites and WSS sites. The services on these servers include enterprise level applications such as Search, Index, User Profile, Content Management, My Sites, Business Data Catalogue, Form Services, Excel Services, Job Scheduling and Usage Reporting.

Another important architectural difference from WSS is the Search database is created for each Shared Services Provider (SSP) database in the farm. The SSP Search database contains search related information such as crawl properties, document properties and propagation properties.

From the user management perspective, MOSS also has several additional services that differentiate it from WSS: Audience, User Profiles database, and Single-Sign-On (SSO). The SSP database contains important data such as the Business Data Catalogue, Site Usage data, BI information and several tables for user management:

  • User Profile information that is imported from a directory service such as Active Directory.
  • Audiences and organizational hierarchies.
  • Security information.

SharePoint Hierarchy
Another important topic that you need to understand related to SharePoint user management is the hierarchy, or scope of the SharePoint architecture. The security and user permissions are applied based on the scope. SharePoint uses the following hierarchy:

1. Farm: This is the highest available level, and refers to all SharePoint installations within a server farm. It can contain multiple servers, but each farm has a single configuration database.

2. Web Application: A Web Application is the container for all sites on a particular server, on a specified IP address and port. Web applications map to one IIS web site, which also map to exactly one SSP. This is what was called Virtual Server in SPv2. As previously mentioned, this is an IIS site that is extended to work with SharePoint.

3. Site Collection: A site collection is a top level site where all sites within a particular web application are grouped. Each site collection can share the same content database, or have its own content database (see the link in the reference external link at the end of this article).

4. Web: Refers to an individual site within a site collection. This is the lowest available level.

SharePoint User Authentication

SharePoint security consists of two main parts: Authentication and Authorization. This section will focus on the Authentication process, which determines how user identity is verified before allowing access to SharePoint sites.

SharePoint itself does NOT handle user authentication, but relies on Windows, ASP.NET and IIS to perform that function. Authentication in WSS v3 has been redesigned on top of the new authentication provider infrastructure introduced with ASP.NET 2.0. SharePoint is shipped out of the box to work with Windows Authentication, but also allows users the capability to work with SQL Server based form authentication. The following identity management systems are supported:

  • Windows: All Microsoft Internet Information Services (IIS) and Windows authentication integration options, including Basic, Digest, Certificates, Windows NT LAN Manager (NTLM), and Kerberos. Windows authentication allows IIS to perform the authentication for Windows SharePoint Services.
  • ASP.NET Forms: A non-Windows identity management system that uses the pluggable Microsoft ASP.NET form-based authentication system. This mode allows Windows SharePoint Services to work with a variety of identity management systems, including externally defined groups or roles such as Lightweight Directory Access Protocol (LDAP) and light-weight database identity management systems. Forms authentication allows ASP.NET to perform the authentication for Windows SharePoint Services, often involving redirect to a log-on page.
  • Delegated: A system for delegating end-user credentials from a trusted system to Windows SharePoint Services. This allows trusted services to pass user identities to Windows SharePoint Services for authorization, conveying who the current user is without requiring that Windows SharePoint Services have that user's credentials.

Note: In this article we use the terms Authentication Provider or Service (frequently used with Active Directory), User Identity Management (frequently used with a custom system), User Authentication System, and User Membership Provider (frequently used to refer to the LDAP provider) interchangeably depending on the context of the topic. In all cases, the term refers to the system that keeps the user information and also provides access permission to SharePoint sites.

Using Multiple Authentication Methods to Access a SharePoint Web Application

You can configure SharePoint Web Applications for access by up to five different authentication methods, thus allowing content of the same web sites to be accessed and authenticated by different target users. For example, employees can be authenticated by using one of the standard Windows authentication methods, which can be Windows integrated login (NTLM) behind the firewall and SSL outside of the firewall. Partners or customers can be authenticated against a simple SQL database Form Authentication or even their own identity management system.

Figure 6: SharePoint Authentication Zones

To configure a SharePoint Web Application for access by two or more different authentication systems, you configure additional zones by extending the Web Application in the Central Administrator. SharePoint Zones represent different logical paths of gaining access to the same physical application (see Figure 6). After extending the Web application, you can configure a separate authentication method for the new zone. The available zones are: Default, Intranet, Internet, Custom, and Extranet.

SharePoint User Management

Since SharePoint uses an external user identity provider, its user operation is very simple. The fact that SharePoint can be provisioned in many different ways, and the overlap between WSS and MOSS tends to confuse most users on how it actually works. Here are some of the important points to remember:

Creating users: You do NOT create a user in SharePoint. Users are created in a user directory provider. You can then add or invite a new user to SharePoint.

Adding new users: You can add or invite a new user from any zone and all authentication methods that are configured, if the membership provider and role manager are registered in the current Web.config file. When you add a new user, Windows SharePoint Services 3.0 resolves the user name against the following sources in the following order:

  • The UserInfoList table stored by WSS v3. User information is in this list if users have already been added to another site.
  • The authentication provider that is configured for the current zone. For example, if a user is a member of the authentication provider that is configured for the default zone, WSS v3 first checks this associated membership provider.
  • All other authentication providers.

Deleting users: User accounts are marked as deleted in the WSS v3 database. However, the user record is not removed.

Managing users: Generally, users who are members of an authentication provider in one zone can manage accounts across all zones as long as they are granted permissions.

Some user authentication systems behave differently within WSS v3, depending on the authentication provider. Figure 7 highlights several common user account tasks that differ depending on the authentication method that is implemented.

Function

Active Directory

LDAP

Form Authentication

Custom

Create Users

AD Console

LDAP Console

Form Console

Custom method

Add Users to SharePoint

SharePoint Top Site Collection

Delete Users

You can remove users from SharePoint. Use the membership console to delete users.

Change Password

AD or Windows

LDAP Console

Form Console

Custom method

Change User Profile

Change user profile in MOSS’s Central Admin

Figure 7: User Authentication Methods Comparison

Note also that MOSS does NOT provide any user management functionality. Although MOSS provides a User Profile database, MOSS uses WSS to handle user management. We will address the differences between User Management and User Profile Management in the next section.

User Profile Management

When you are using just WSS, the user management situation is pretty simple as shown in Figure 8. WSS has a People and Groups feature that keeps track of user information. The user information is managed by:

Figure 8: WSS User Management

1. When you add a user to WSS, the system adds a limited number of properties from the user authentication provider (e.g. Active Directory) to the WSS Content database’s User Info table. This is a one-time sync between the User Directory provider to the WSS database as shown in path 1 in Figure 8. WSS tries to map as much information from the User Directory Services to the UserInfo table as possible on the initial sync.

2. You can add extra columns to the user info list, but they must be updated manually and are not synced with the User Directory services as shown in path 2 in Figure 8.

3. This user information is stored per site (remember, this is not per SharePoint Web, it is the top site collection). Clicking on the "My Settings" link takes you to a page where this information can be maintained.

MOSS, on the other hand, is a little confusing. MOSS has a User Profile database that is stored in the SSP database. It provides a much more extensive User Profile feature that allows for scheduled synchronization from one or more User Directory Services, which could be AD/LDAP/BDC/Custom, at regular intervals. You can also define properties and set various policies on how data is imported from various User Directory Services.

As you can see in Figure 9, there are more complex conditions in MOSS when dealing with user management. The user information is propagated between various databases.

Figure 9: MOSS User Profiles

1. Since MOSS is based on WSS, it also lets WSS manage its own user information. When you add a user to a MOSS site, such as a Team Site, WSS still copies a subset of the user information from the User Directory Services (AD) to the UserInfo table in the content database, as shown in path 1 in Figure 9.

2. At the same time, when you add a user to MOSS, it also checks to see if that user already has a record in its User Profile database. If a record does not exist, it creates a record in the User Profile table.

3. The User Profile table is stored in the Shared Services Provider (SSP) database. Remember that SSP is independent of any front-end Web Application, thus it can manage the users within a farm that has multiple Web Applications.

4. The SSP User Profile database is updated from the profile information in the User Directory services via a scheduled update. This is done in the Central Admin site of the SharePoint Farm. You can specify when this import runs, and what properties are imported to SSP. This is path 2 in Figure 9.

5. MOSS replicates the profile information in the SSP database to the individual content database’s UserInfo table via a scheduled update. This timer runs every hour and copies properties, such as picture, department, etc. Note that only the profile properties that are marked with the option "replicable" are updated via the timer. This is path 3 in Figure 9.

With a MOSS installation, you also need to be aware of several differences from a WSS-only installation:

1. The most confusing factor for some people is how MOSS displays user information. When you view an item’s CreatedBy and ModifiedBy, those fields came from the UserInfo table in the content database. But when you view information in My Site, that information comes directly from SSP’s User Profile database. If you update a user profile in MOSS, there might be some delay in propagating this information from the SSP database into the UserInfo table and thus create lots of confusion.

2. Since SSP-based User Profile information exists, if you edit MySettings at a SharePoint site collection, it actually edits the User Profile information in the SSP database. This is different from a normal WSS mode where My Settings updates the information in the UserInfo table.

3. Individual users can manage their information in the UserInfo table via the MySettings link, which is directed to the display form userdisp.aspx?ID=[userid], or to the edit form useredit.aspx?ID=[userid]. This information is overridden by the user profile information in the SSP database.

To make it even more confusing, if your SharePoint installation has My Sites enabled, things are more convoluted. In MOSS, My Sites are special SharePoint sites that are personalized for each user. My Sites are enabled by default, and every user in an organization has a unique My Site. The reason that site personalization is stored in SSP is so that larger organizations that have multiple Web Applications and Portal sites can reference ONE personalization site.

As soon as the My Site feature is activated, any User Profiles from an existing installation of WSS are replaced by the public profiles that are part of My Site. A My Site link is added to the top menu bar for all sites in the site collection, along with the My Links menu. In other words:

1. If My Sites is enabled, the user has to manage their profile information via their My Site link. The link at My Settings in this configuration is read-only.

2. If My Sites is NOT enabled, then administrators can and should manage User Profile information via the SSP profile database, or My Settings for the user being edited.

Figure 10: Different Access Points to User Profile in MOSS

Lastly, deletion of a user profile also has implications in MOSS. When you delete a User Profile in MOSS, the profile record is moved from the UserProfile table in SSP to the DeleteUsers table, and the deleted user’s My Site becomes inaccessible. This way, if the user is re-imported in at a later date, some information such as Document Libraries and the My Site can be reactivated.

User Profile Information from Business Data Catalog

Business Data Catalog (BDC) is a feature in MOSS that allows users to create an interface to external information systems (databases) without writing any code. You can also import external User Profile information from a BDC interface into the MOSS User Profile database. A real world example is to set up a BDC interface to your company payroll or financial system to import employees’ Social Security Numbers into their MOSS User Profiles. This capability also provides some misconceptions on how BDC plays into the overall SharePoint user management capability.

· Although you can import user information from a BDC interface into a MOSS User Profile, similar to how you import data from Active Directory, BDC can NOT act as an authentication provider.

· Although you can import data from a BDC catalog, this can only act as a supplemental import. Another primary user authentication provider (i.e., Active Directory or LDAP) has to be configured as the primary source before you can use BDC. This has implications when you use SQL Forms as your primary authentication provider: you will not be able to set up the automatic import from that source and thus you will also not be able to import supplemental data from a BDC catalog.

SharePoint Authorization

Once a user has been authenticated for access to a SharePoint site, the SharePoint authorization process determines which objects in the system a user can access and perform actions on. With the latest release of MOSS 2007, permissions are handled strictly at the WSS platform level.

In this section, we will describe several important concepts that make up the authorization process in SharePoint:

· Permissions

· Permission Levels

· Securable Objects

· SharePoint Groups

Permissions

Permissions (rights in previous WSS versions) are the rights for a user to perform specific actions such as viewing pages, editing items, and creating sub-sites. WSS provides 33 pre-defined permissions that you can use to allow users to perform specific actions that are grouped into three main categories: List, Site, or Personal. SharePoint permissions are not assigned directly to users or SharePoint groups, but are assigned to one or more permission levels, which are in turn assigned to users and SharePoint groups.

Figure 11: SharePoint Permission Levels

SharePoint Permission Levels

A SharePoint Permission Level (site groups in previous WSS versions) is a group of permissions that can be granted to users or SharePoint groups so that they can perform specific actions on securable objects such as a site, library, list, folder, item, or document on your site. Permission levels allow you to group permissions and apply them to users and SharePoint groups on various sites in your SharePoint installation.

When you create a new SharePoint site, there are five permission levels provided by default:

· Full Control: allows users or groups full control over a site. Full Control is the least restrictive permission level. You can not modify or remove this permission level.

· Design: allows users or groups to view, add, update, delete, approve, and customize lists, libraries, and pages on your site, including themes and style sheets.

· Contribute: allows users or groups to view, add, update, and delete previously created list items and document libraries.

· Read: allows users or groups to read pages on the site including the resource libraries. Read is the most restrictive permission level.

· Limited Access: is a permission level that is automatically assigned to a user or group and therefore cannot be directly assigned by the administrator. It is used when you assign the users or groups to a child object of a parent object to which they do not have access. You can not modify or remove this permission level.

Figure 12: Definition of SharePoint Permission Levels

Securable Objects Permission

SharePoint provides the ability to manage item level permissions on individual objects (such as lists and libraries), even down to the individual folders, documents, and list items within those lists and libraries. These items that you can apply permissions to are called Securable Objects. Each site contains additional securable objects which have a particular position in the site hierarchy, as shown in Figure 13.

Figure 13: SharePoint Securable Objects

Hierarchy and Inheritance

In SharePoint, permissions on any securable object, such as web sites, lists, libraries, folders and documents, are inherited from their parent object. However, you can break this inheritance for any securable object at a lower level in the hierarchy by creating a unique permission on that securable object. For example, you can create a sub-site (Web) and break the permission inheritance from the parent if you want to limit (or expand) the group of users who can have access permission to the site for security reasons. When you break the inheritance from the parent, the securable object to which you broke the inheritance receives a copy of the parent's permissions. You can then edit those permissions to be unique — meaning that any changes you make to the permissions on that securable object do not affect the parent.

Figure 14: SharePoint Security Inheritance

In our example, sub-sites A, B and C inherit permissions from the top-level Web site. This means that changes made to SharePoint groups and permission levels on the top-level site also affect all of those sub-sites. When you make any change in sub-sites A, B or C, you are actually making changes at the parent site, since SharePoint does not allow you to manage permission on a sub-site that is inheriting permissions from its parent site.

Sub-site D has unique permissions, which are not inherited from its parent site. Therefore, any changes made to the permission levels and SharePoint groups on Sub-site D do not affect its parent site.

SharePoint Users and Groups

You can add a user to SharePoint who has a valid account that has been authenticated as mentioned in SharePoint User Authentication. When a user is added to the system, you can assign permissions directly to a securable object (web, list, library, etc.) or indirectly through a SharePoint Group. Using SharePoint Groups is the recommended practice when managing security since it’s easier to manage changes for a group than for individual users, and apply the same group to different objects across your sites.

A SharePoint Group (cross site group in previous WSS versions) is a logical grouping of users that you can create to manage permissions to the site and to provide an e-mail distribution list for site members. All SharePoint groups are created at the site collection level and are available to all sub-sites in the site collection. You can also create groups that only have permissions to a particular sub-site as shown in path 1 in Figure 15.

SharePoint groups can contain Windows (Active Directory) security groups, ASP.NET Forms authentication groups (using the roles within the role membership provider), and individual users with a user account on the local server or a Windows domain as shown in path 2 in Figure 15.

Figure 15: SharePoint Groups and Users Scope

SharePoint provides three default SharePoint groups with permissions on the top-level site, each with a Site name prefix. These default groups are also provided when a new site with unique permissions is created.

· Site Owners: have Full Control permissions in the site.

· Site Members: have Contribute permissions.

· Site Readers: have Read permissions.

Each of these SharePoint groups is associated with a default permission level, but you can change the permission level for any SharePoint group as needed.

Figure 16: SharePoint Group Permission

SharePoint Audience

A practical way to apply user profiles out of the box is audience targeting. Audience targeting refers to the ability to create a group of users based on a specific set of rules and then target content to that specific audience. You can target specific content such as a SharePoint List, library items, navigation links, and Web Parts to a specific group of people.

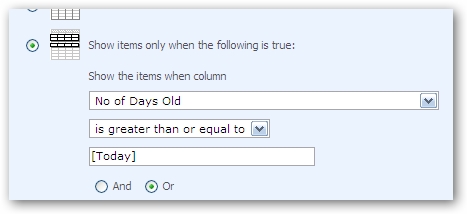
You can create an audience in MOSS using its Central Administration tool. Audiences are created based on a set of rules. The example in Figure 17 shows how an audience of Sport Fans is created by looking for the world “NFL” in the About Me field in their User Profile.

Figure 17: Setup Audience rule.

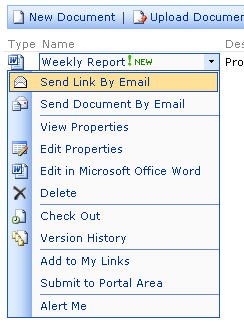
Once the Audience is created, you can enable audience targeting. Select the securable objects for specific audiences using an Audience Targeting column for the library or list containing the items of interest.

Figure 18: Target a Document Library to a Specific Audience

MOSS Single-Sign-On

MOSS provides another capability to help with user security management which is called Single-Sign-On (SSO). This is a feature that does not affect the internal operation of MOSS, and actually is not even installed by the default installation program. SSO is a database created in MOSS to keep and manage a set of user names and passwords that can be used to access specific external systems that require access authentication.

An example is if you have a need to crawl and index a backend office system (e.g. SAP or Oracle) to retrieve information that is then made available to the SharePoint enterprise search. These systems might require login accounts for access, and the accounts’ access information can be retrieved for those purposes. There are several benefits to using SSO; i.e., the access information is encrypted and is more secure, and the account information can be managed by an IT administrator while the Web Parts or code that use the account do not have to know the account details, but just how to use it.

Summary

Hopefully, this article provided you with a solid basic understanding of how SharePoint manages its users. Additional information can be found in various books and online articles; please see the Reference section for suggested reading. Given the complexity of managing users in SharePoint, Bamboo Solutions has provided several Web Parts and Solution Accelerators that are very useful to help you keep the situation under control and create a happy and productive work force. Check these products out on the Bamboo Solutions’ web site:

  • User Management Solution Accelerator. Spend less time managing your SharePoint user accounts. Simply add, edit, move, and clone user accounts and access security in one place.
  • User Account Setup Web Part. Create new users quickly and easily in both Active Directory (or NT) and SharePoint from one location to save IT Administrator time and effort.
  • Password Reset Web Part. Allow SharePoint users to reset their Active Directory or NT password without administrator intervention.
  • Password Change Web Part. Alleviate the workload of SharePoint Administrators by allowing users to change their own passwords while automatically adhering to your security policy.
  • Password Expiration Web Part. Send your SharePoint users E-mail notifications before their password expires.
  • User Profile Sync. Synchronize user profile information between your SharePoint Directory and Active Directory databases.

About the author

Lam Le is a member of the Bamboo Solutions Product Team. As a founding member of Bamboo Solutions, Lam Le brings more than 25 years of experience successfully developing and running high technology product organizations. Le previously served as Principal Technology Advisor for Northrup Grumman/PRC, where he formed and managed the product development for enterprise-wide document management software, marketed to both commercial and federal industries. Prior to PRC, he was Principal Engineer for Oracle, leading the team responsible for creating business automation software. He has been involved with numerous products and projects involving SharePoint and Collaboration technology. He can be reached via e-mail.

Source:store.bamboosolutions.com